🗓️ How to Set Up, Edit, and Delete Off Days in the Tiny Parrot App
This guide will walk you through how to manage your off days using the Tiny Parrot app—from creating a new day off to editing or deleting an existing one.
✅ Step 1: Open the Tiny Parrot App
Start by launching the Tiny Parrot app on your mobile device.
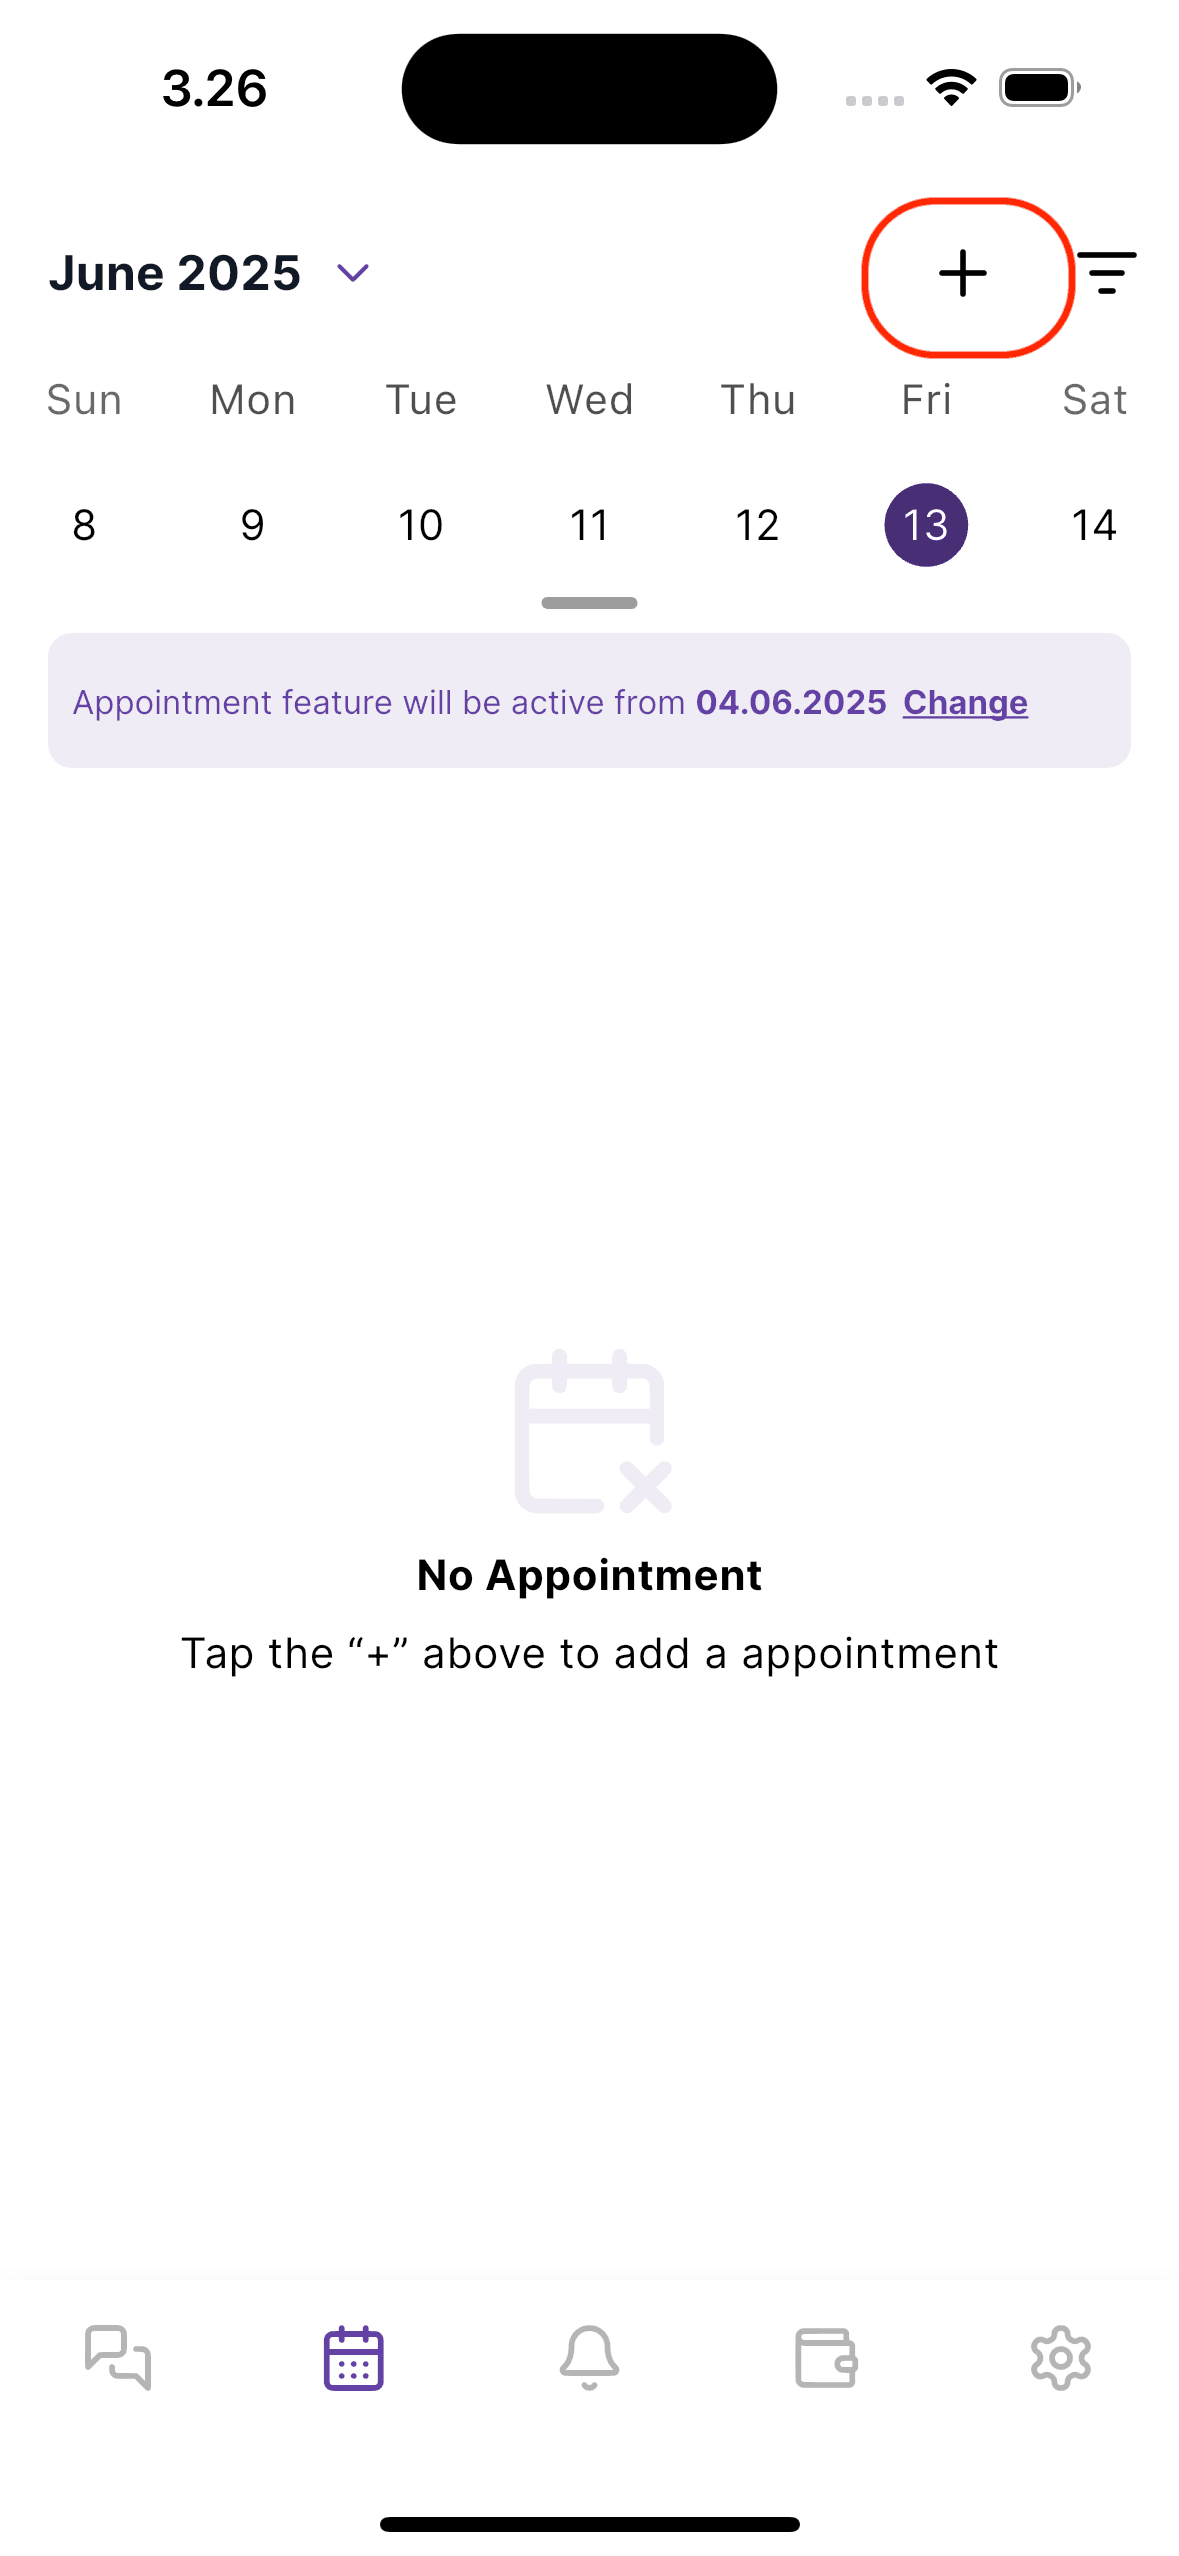
📆 Step 2: Go to the Calendar Screen
- Look at the bottom navigation bar.
- Tap the Calendar icon 🗓️ to open the Calendar screen.
- This screen shows an overview of your bookings, schedules, and off days.
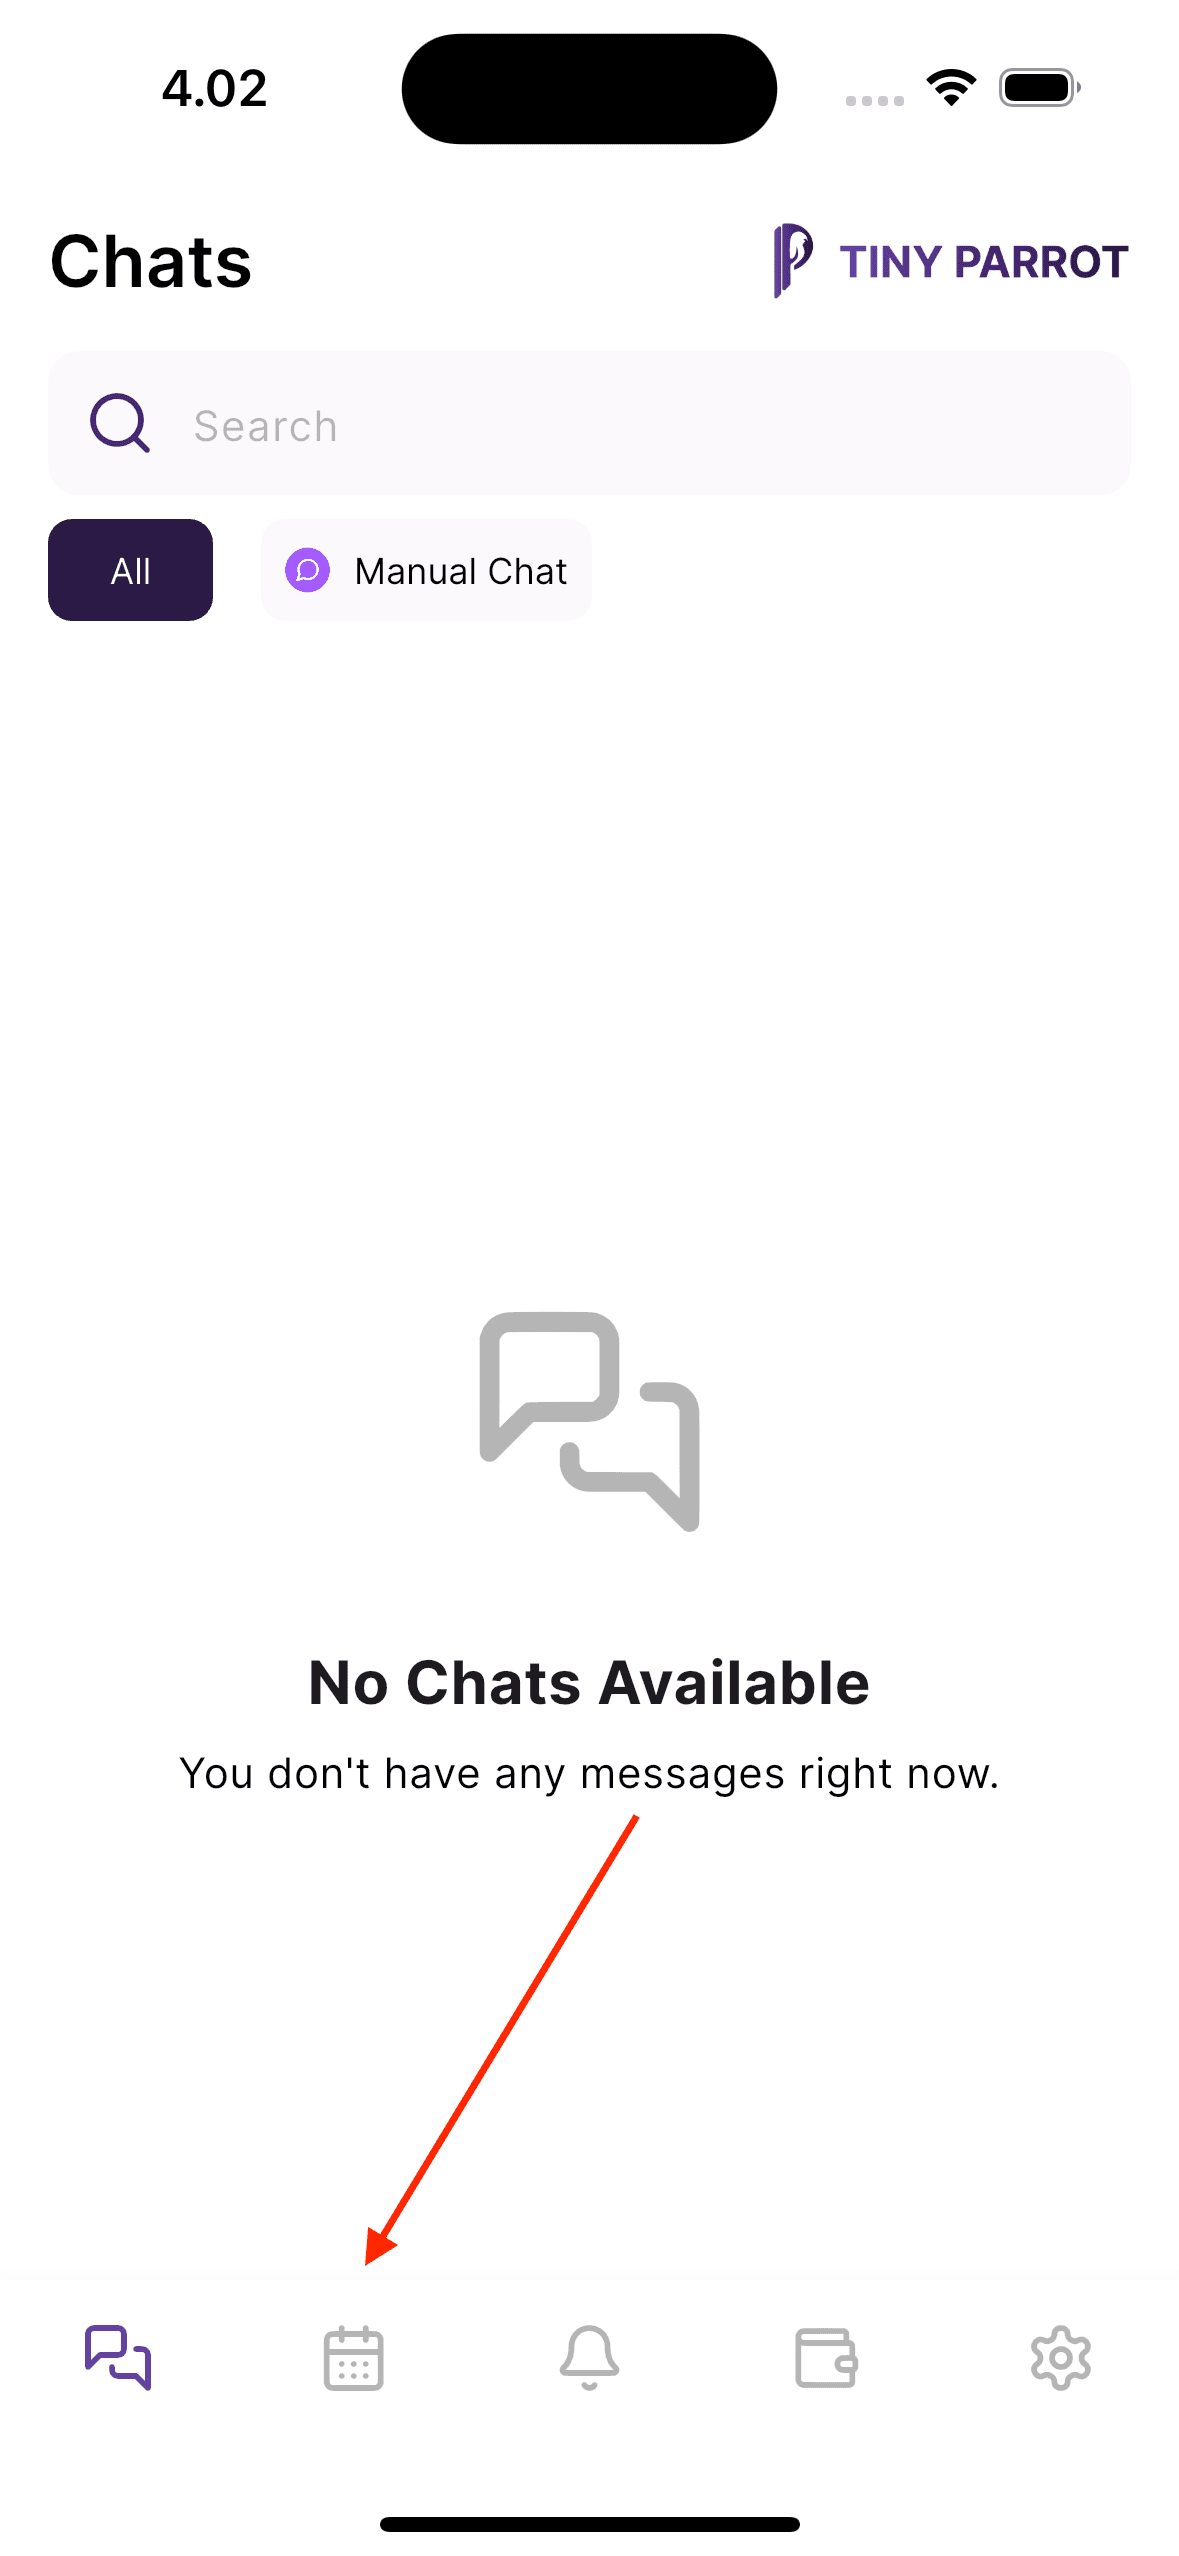
💡 Tip: The Calendar screen is your main hub for managing appointments and breaks.
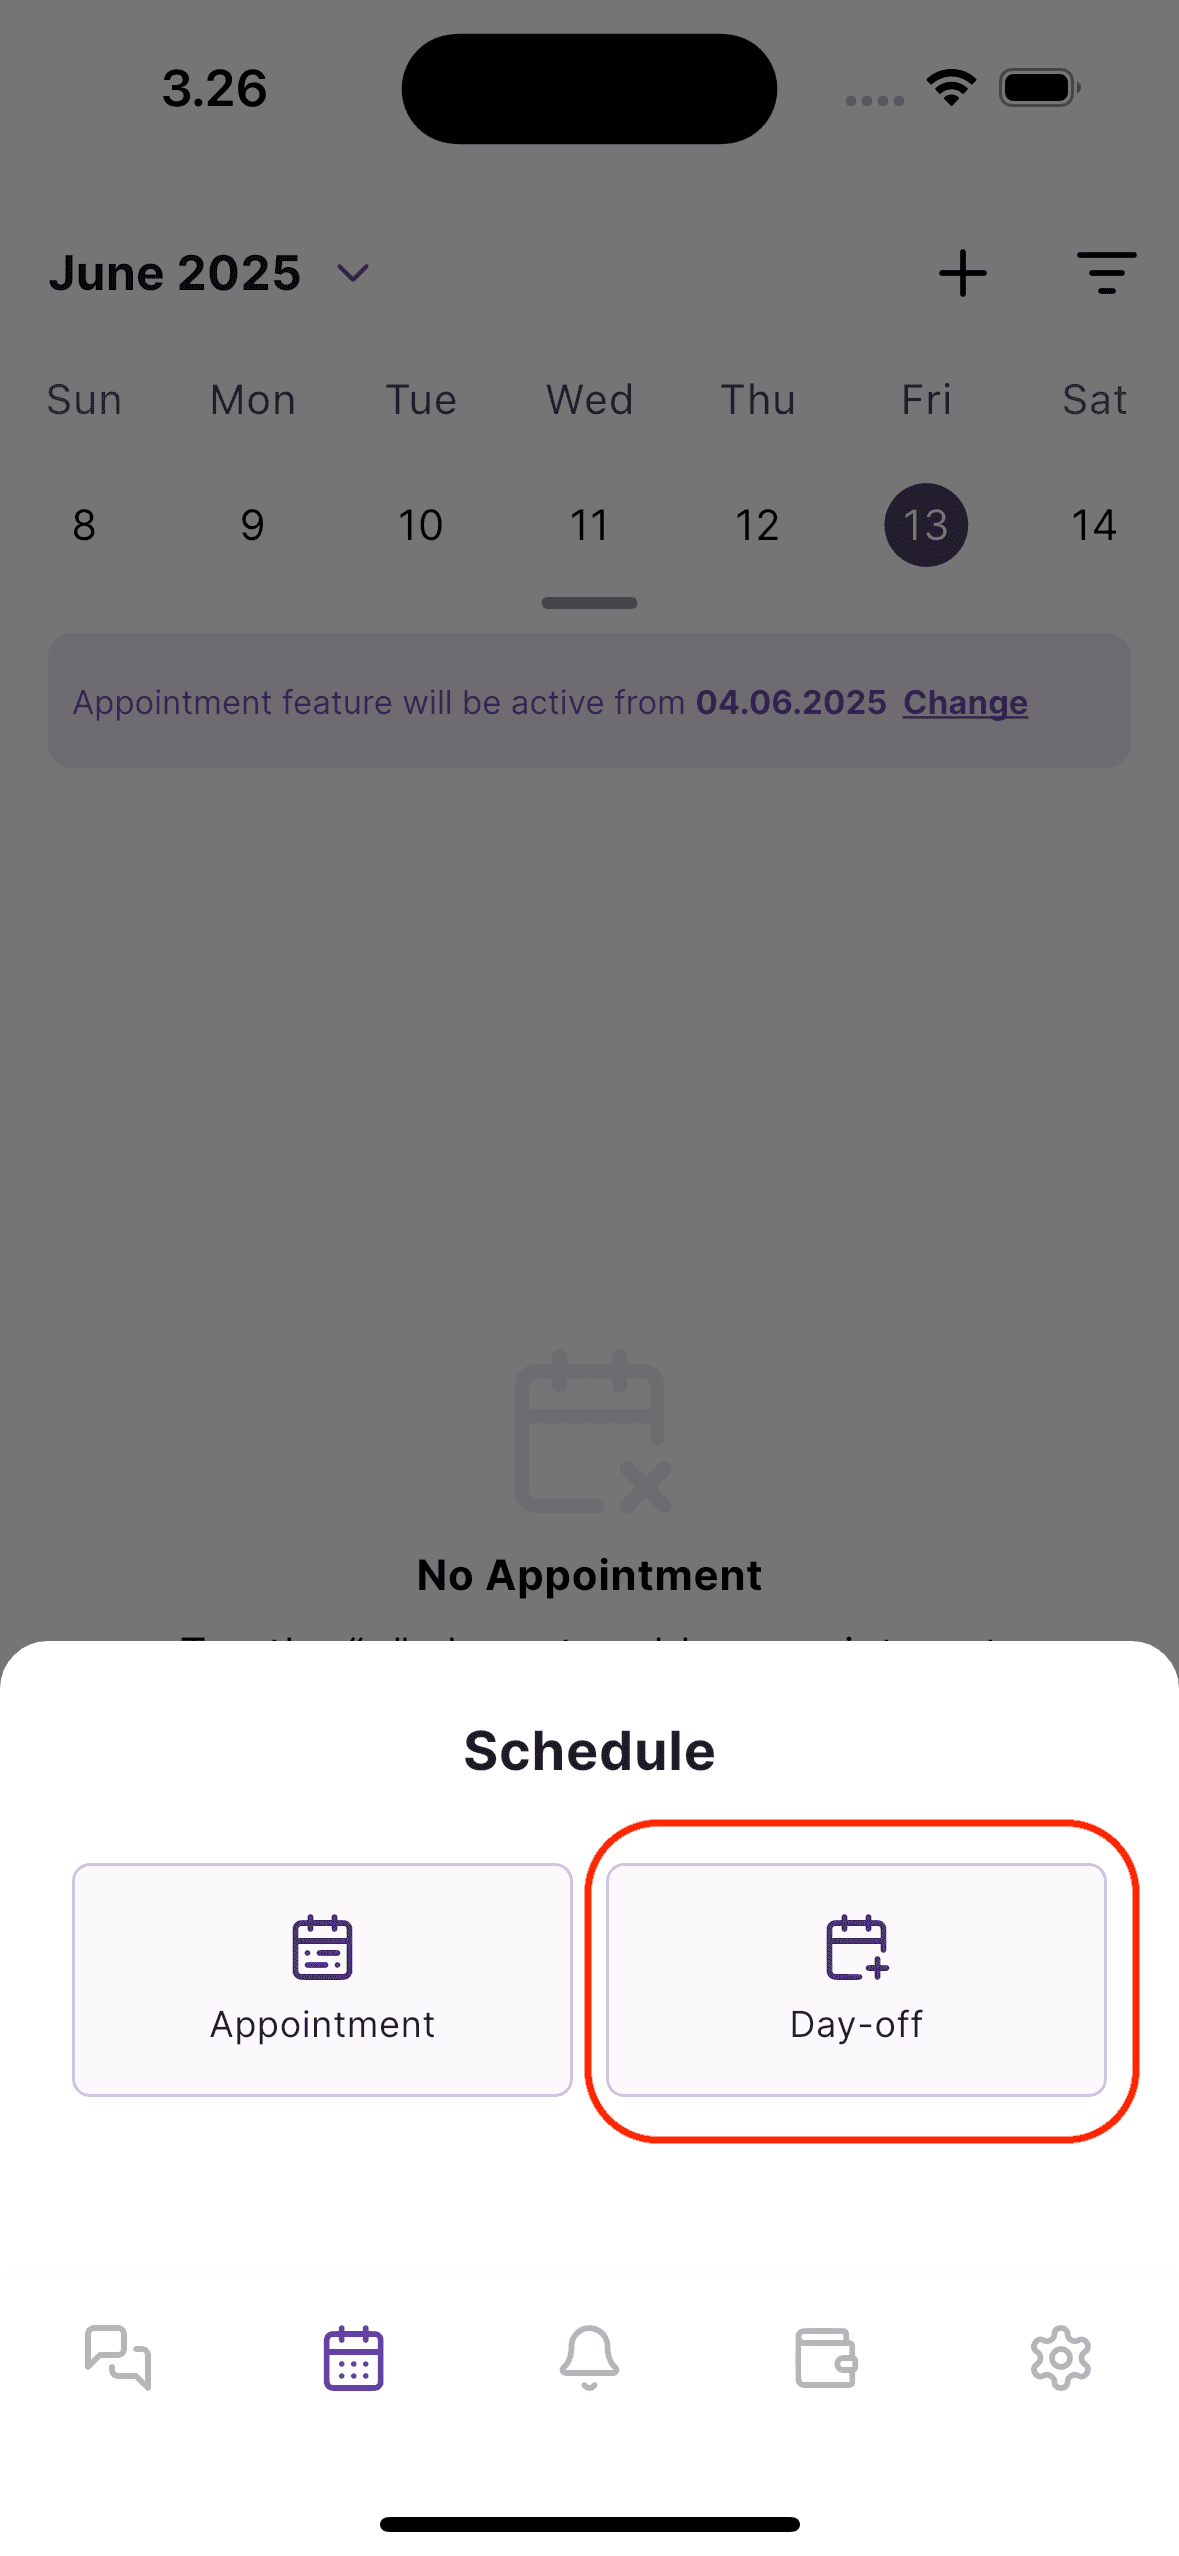
➕ Step 3: Open the Schedule Dialog
- On the Calendar screen, tap the “+” (plus) button in the top-right corner.
- A dialog will appear with several scheduling options.
- Tap on the “Day Off” card to begin creating a new off day.
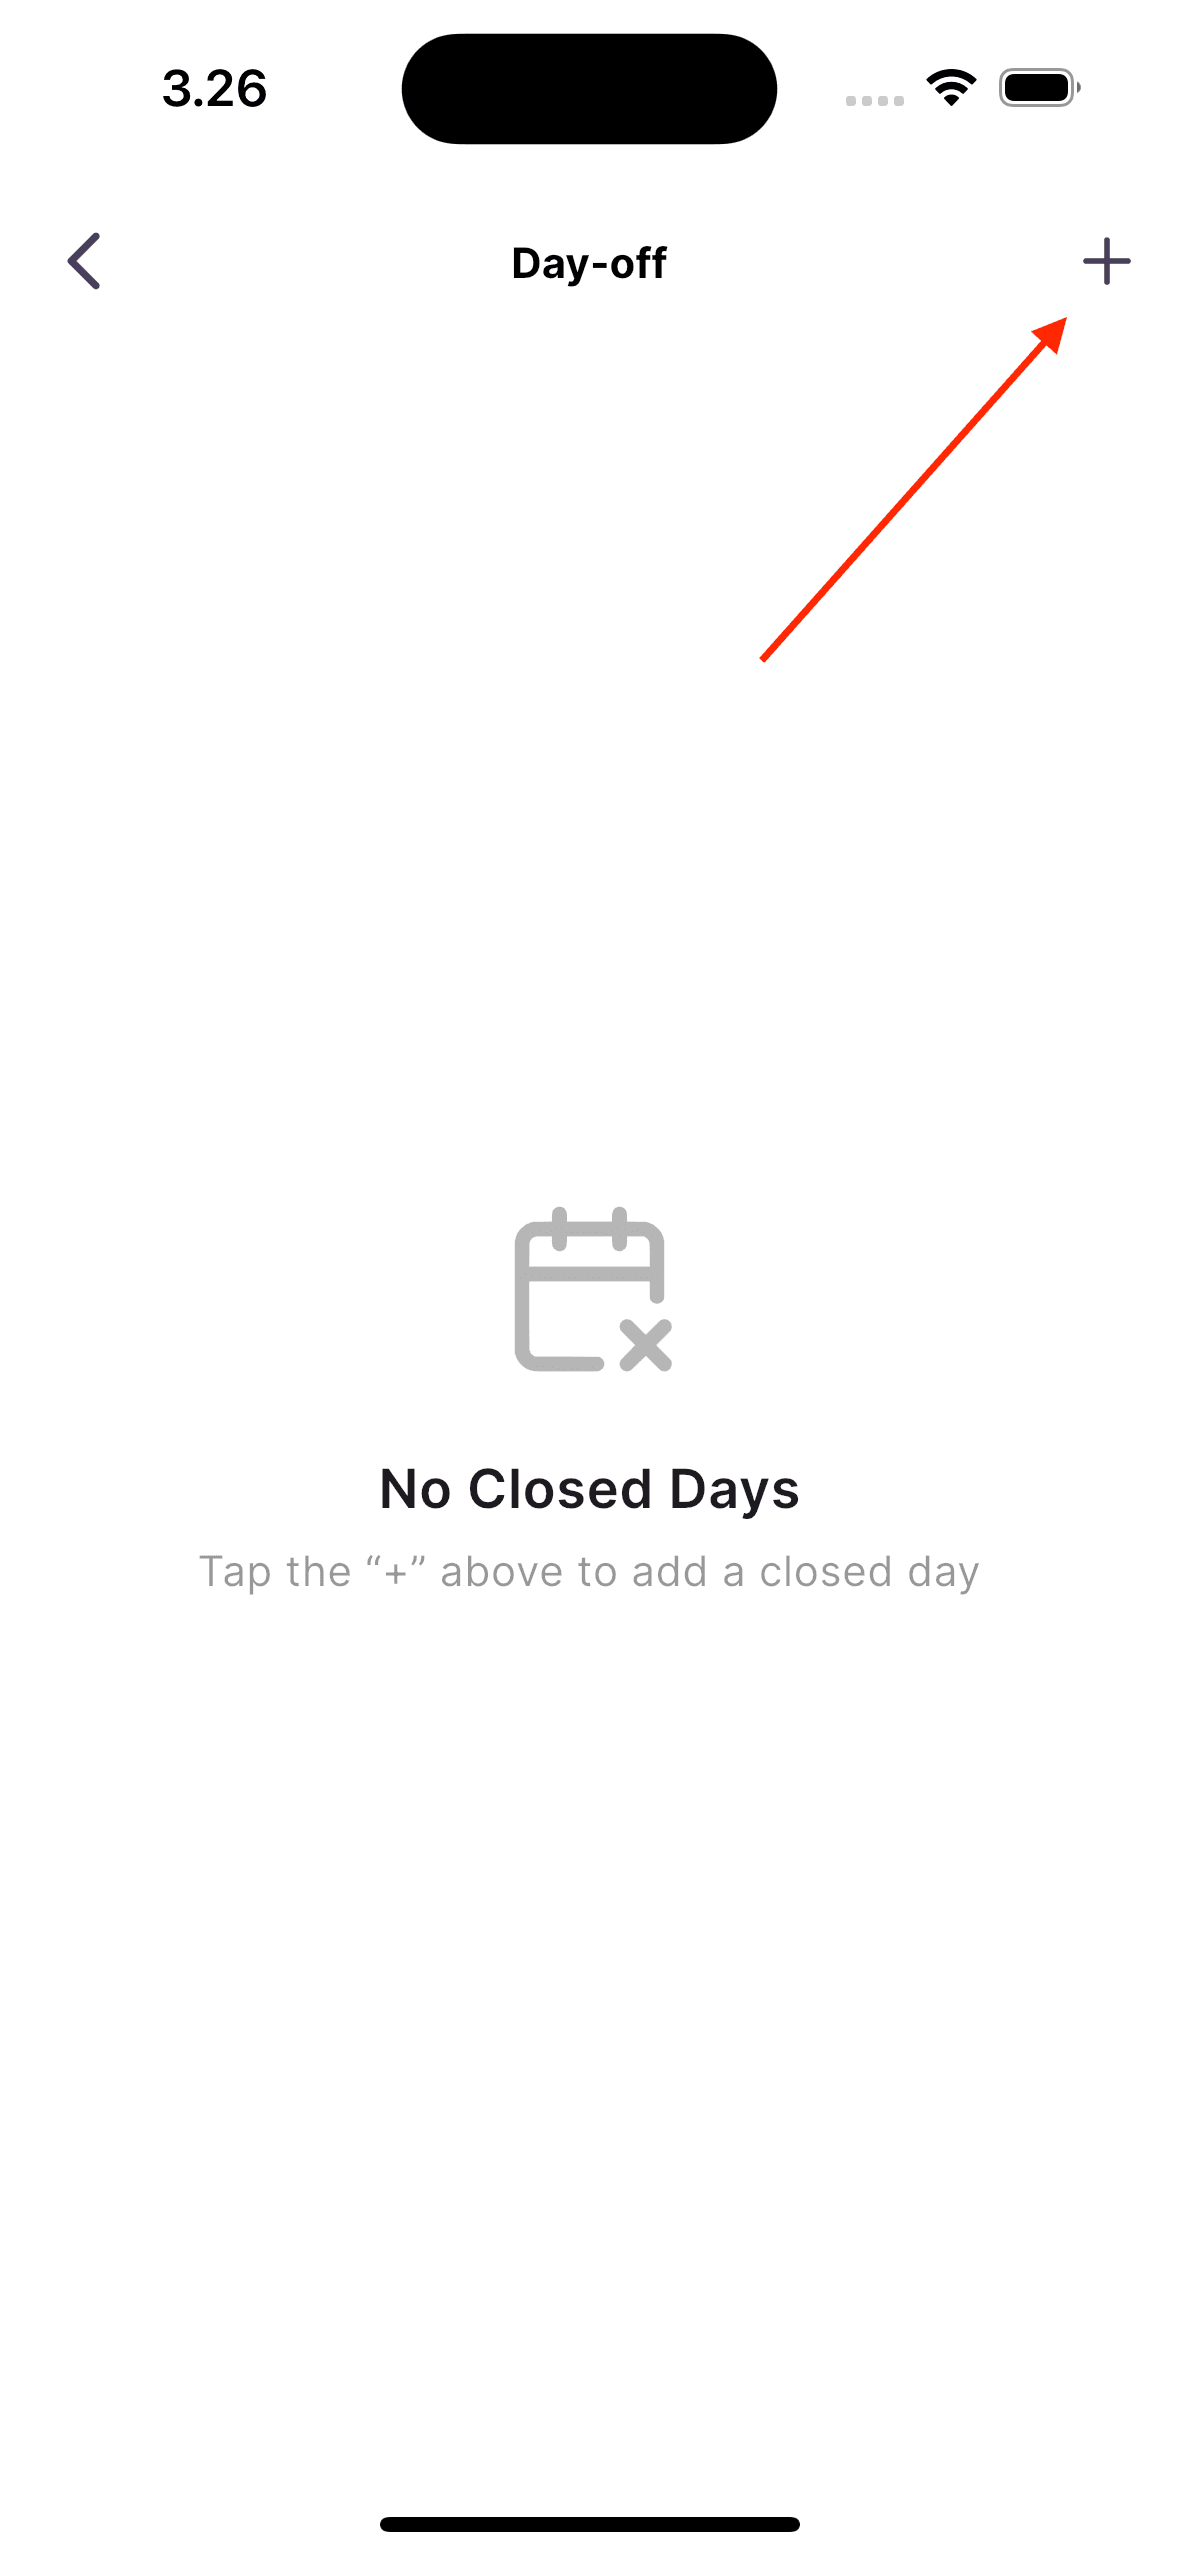
📋 Step 4: View the Day Off List
- You’ll now be on the Day Off screen, where all your previously created off days are listed.
- To add a new one, tap the “+” (plus) icon in the top-right corner again.
- This will take you to the Add Day Off form.
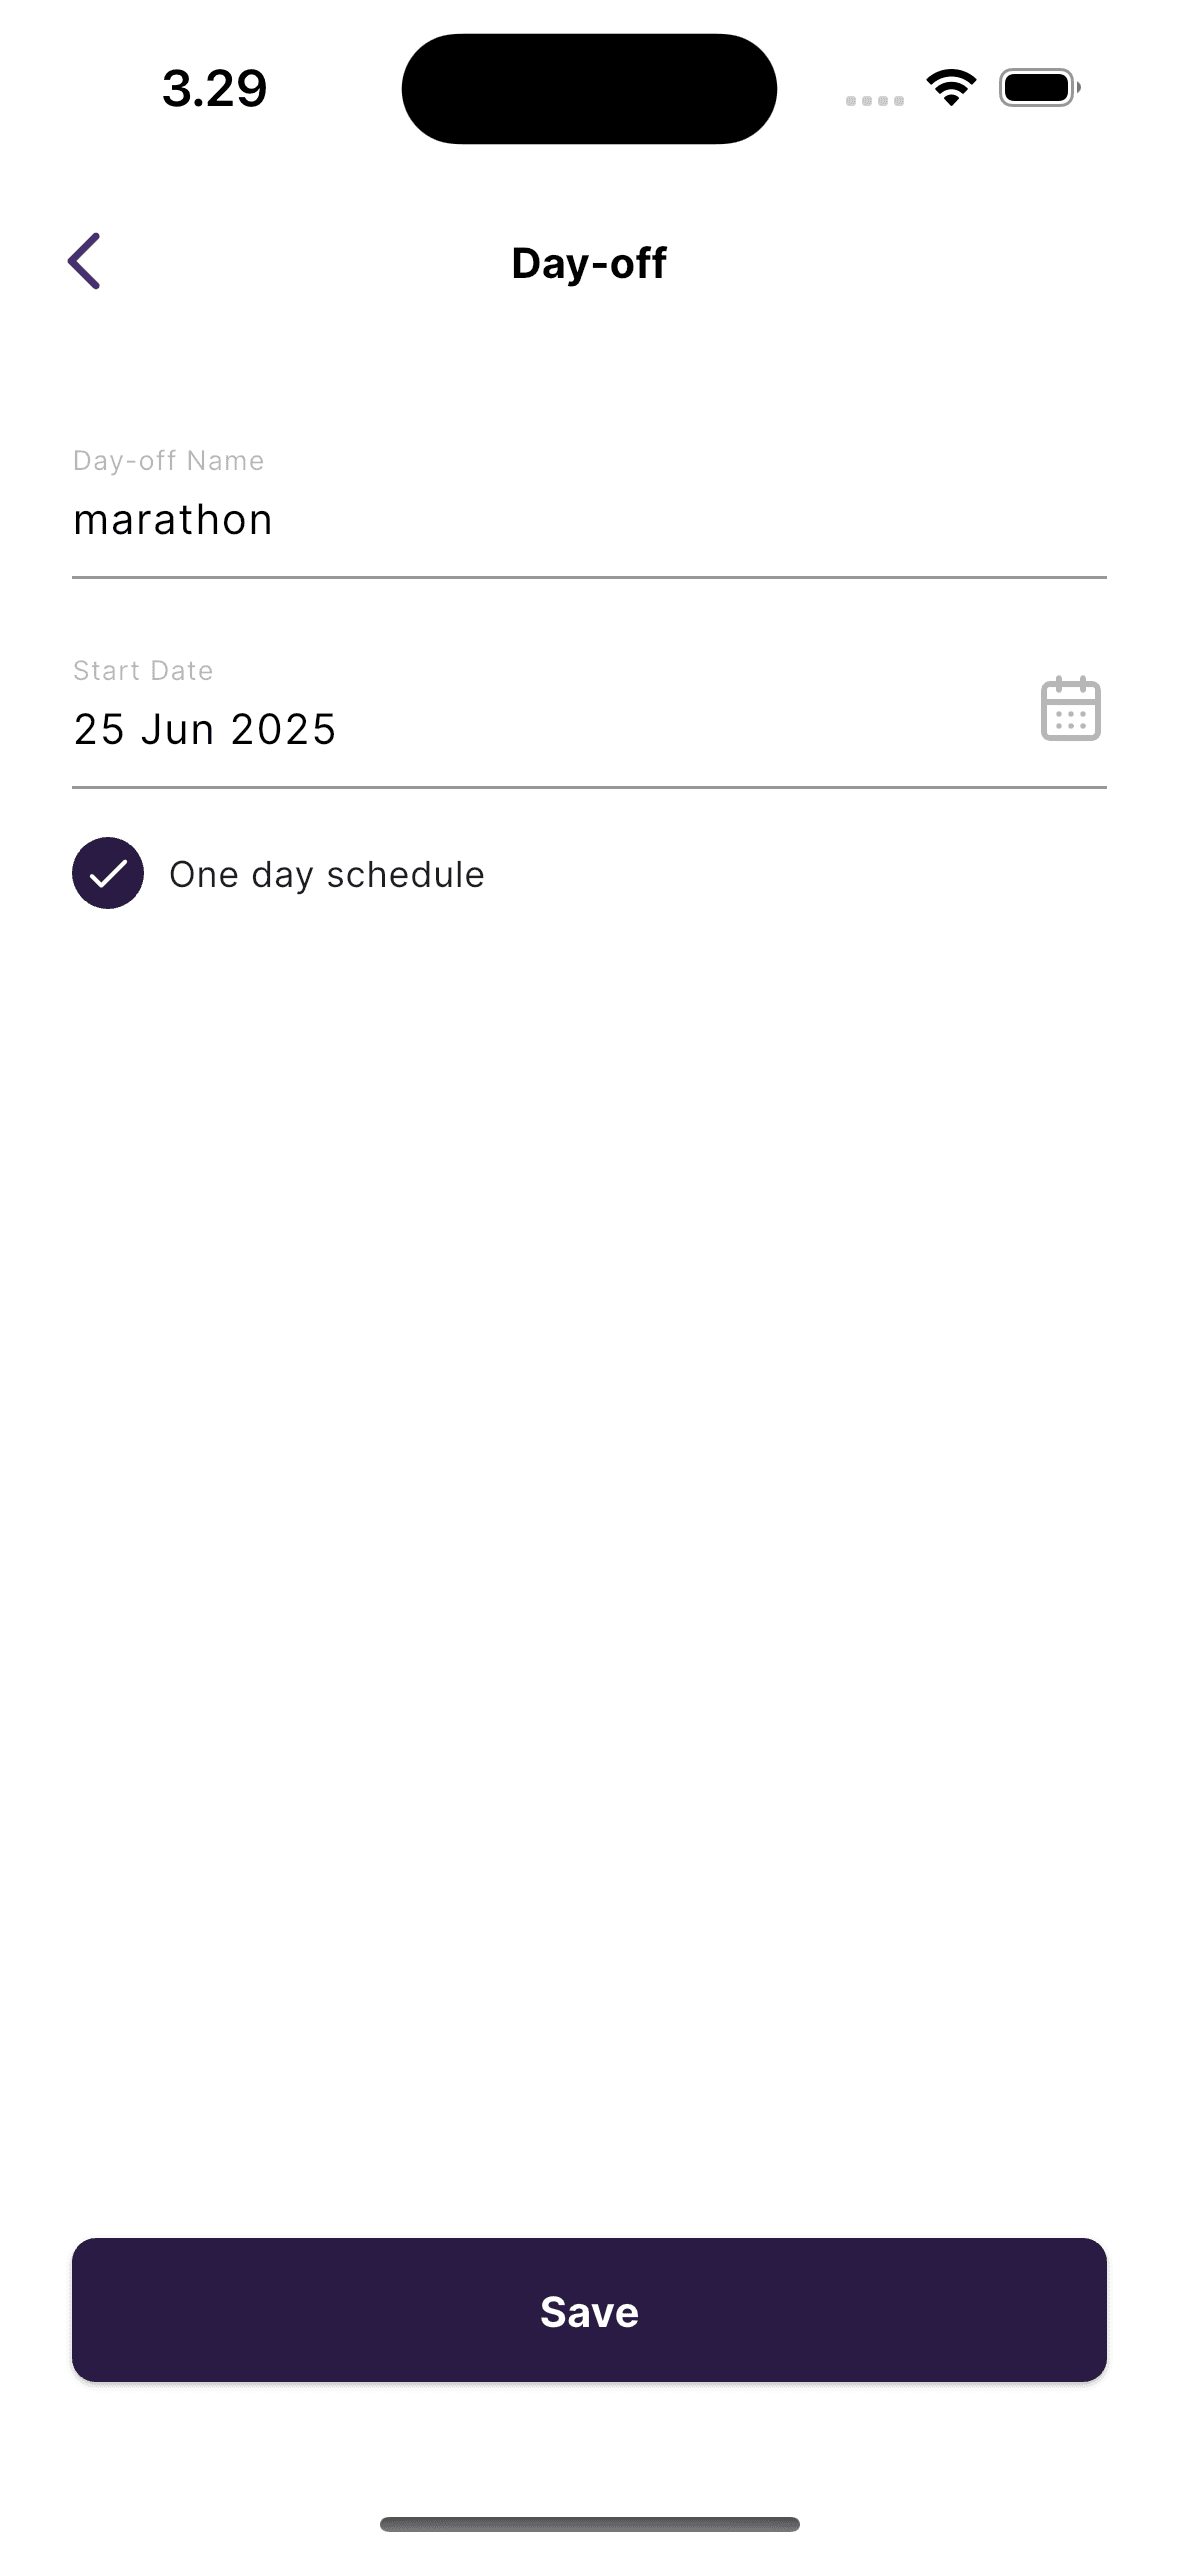
📝 Step 5: Fill Out the “Add Day Off” Form
In the form, enter the following information:
- Day Off Name: Give your off day a title (e.g., Vacation, Medical Leave, or Personal Time).
- Start Date: Select the starting date of your off day.
- End Date: Select the ending date of your off day.
- One Day Schedule: If it's just a single day, check this box to automatically set the end date the same as the start date.
✅ Double-check the details and tap “Save” when you're done.
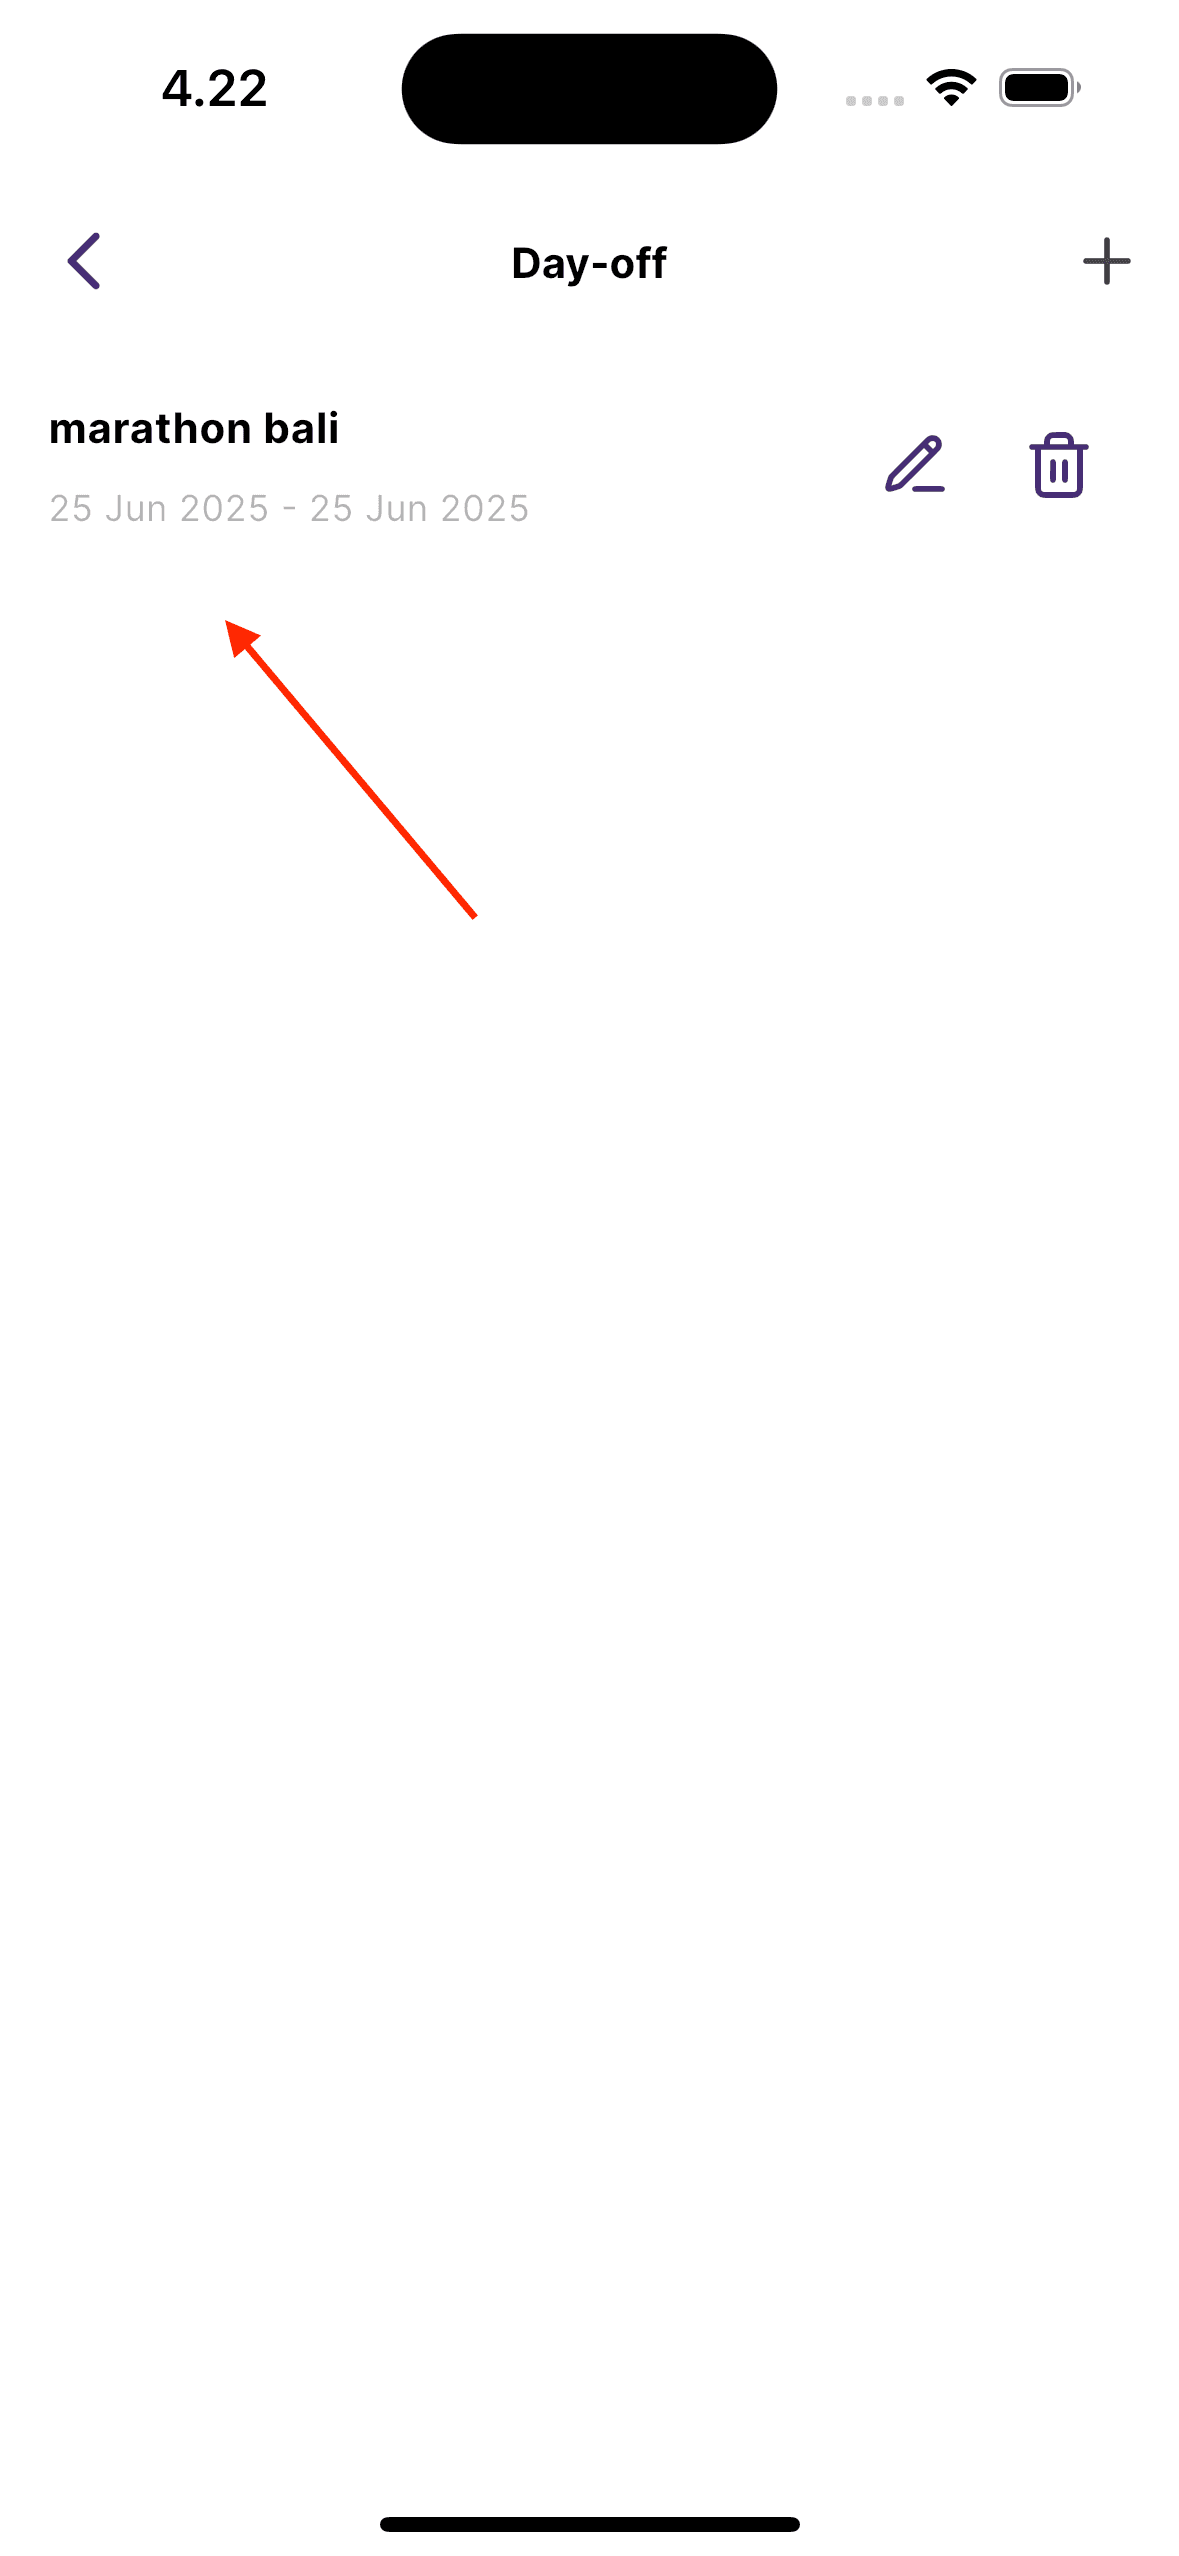
✅ Step 6: Confirmation of Created Off Day
- After saving, you'll be redirected back to the Day Off list screen.
- Your newly created off day will now be visible in the list along with others.
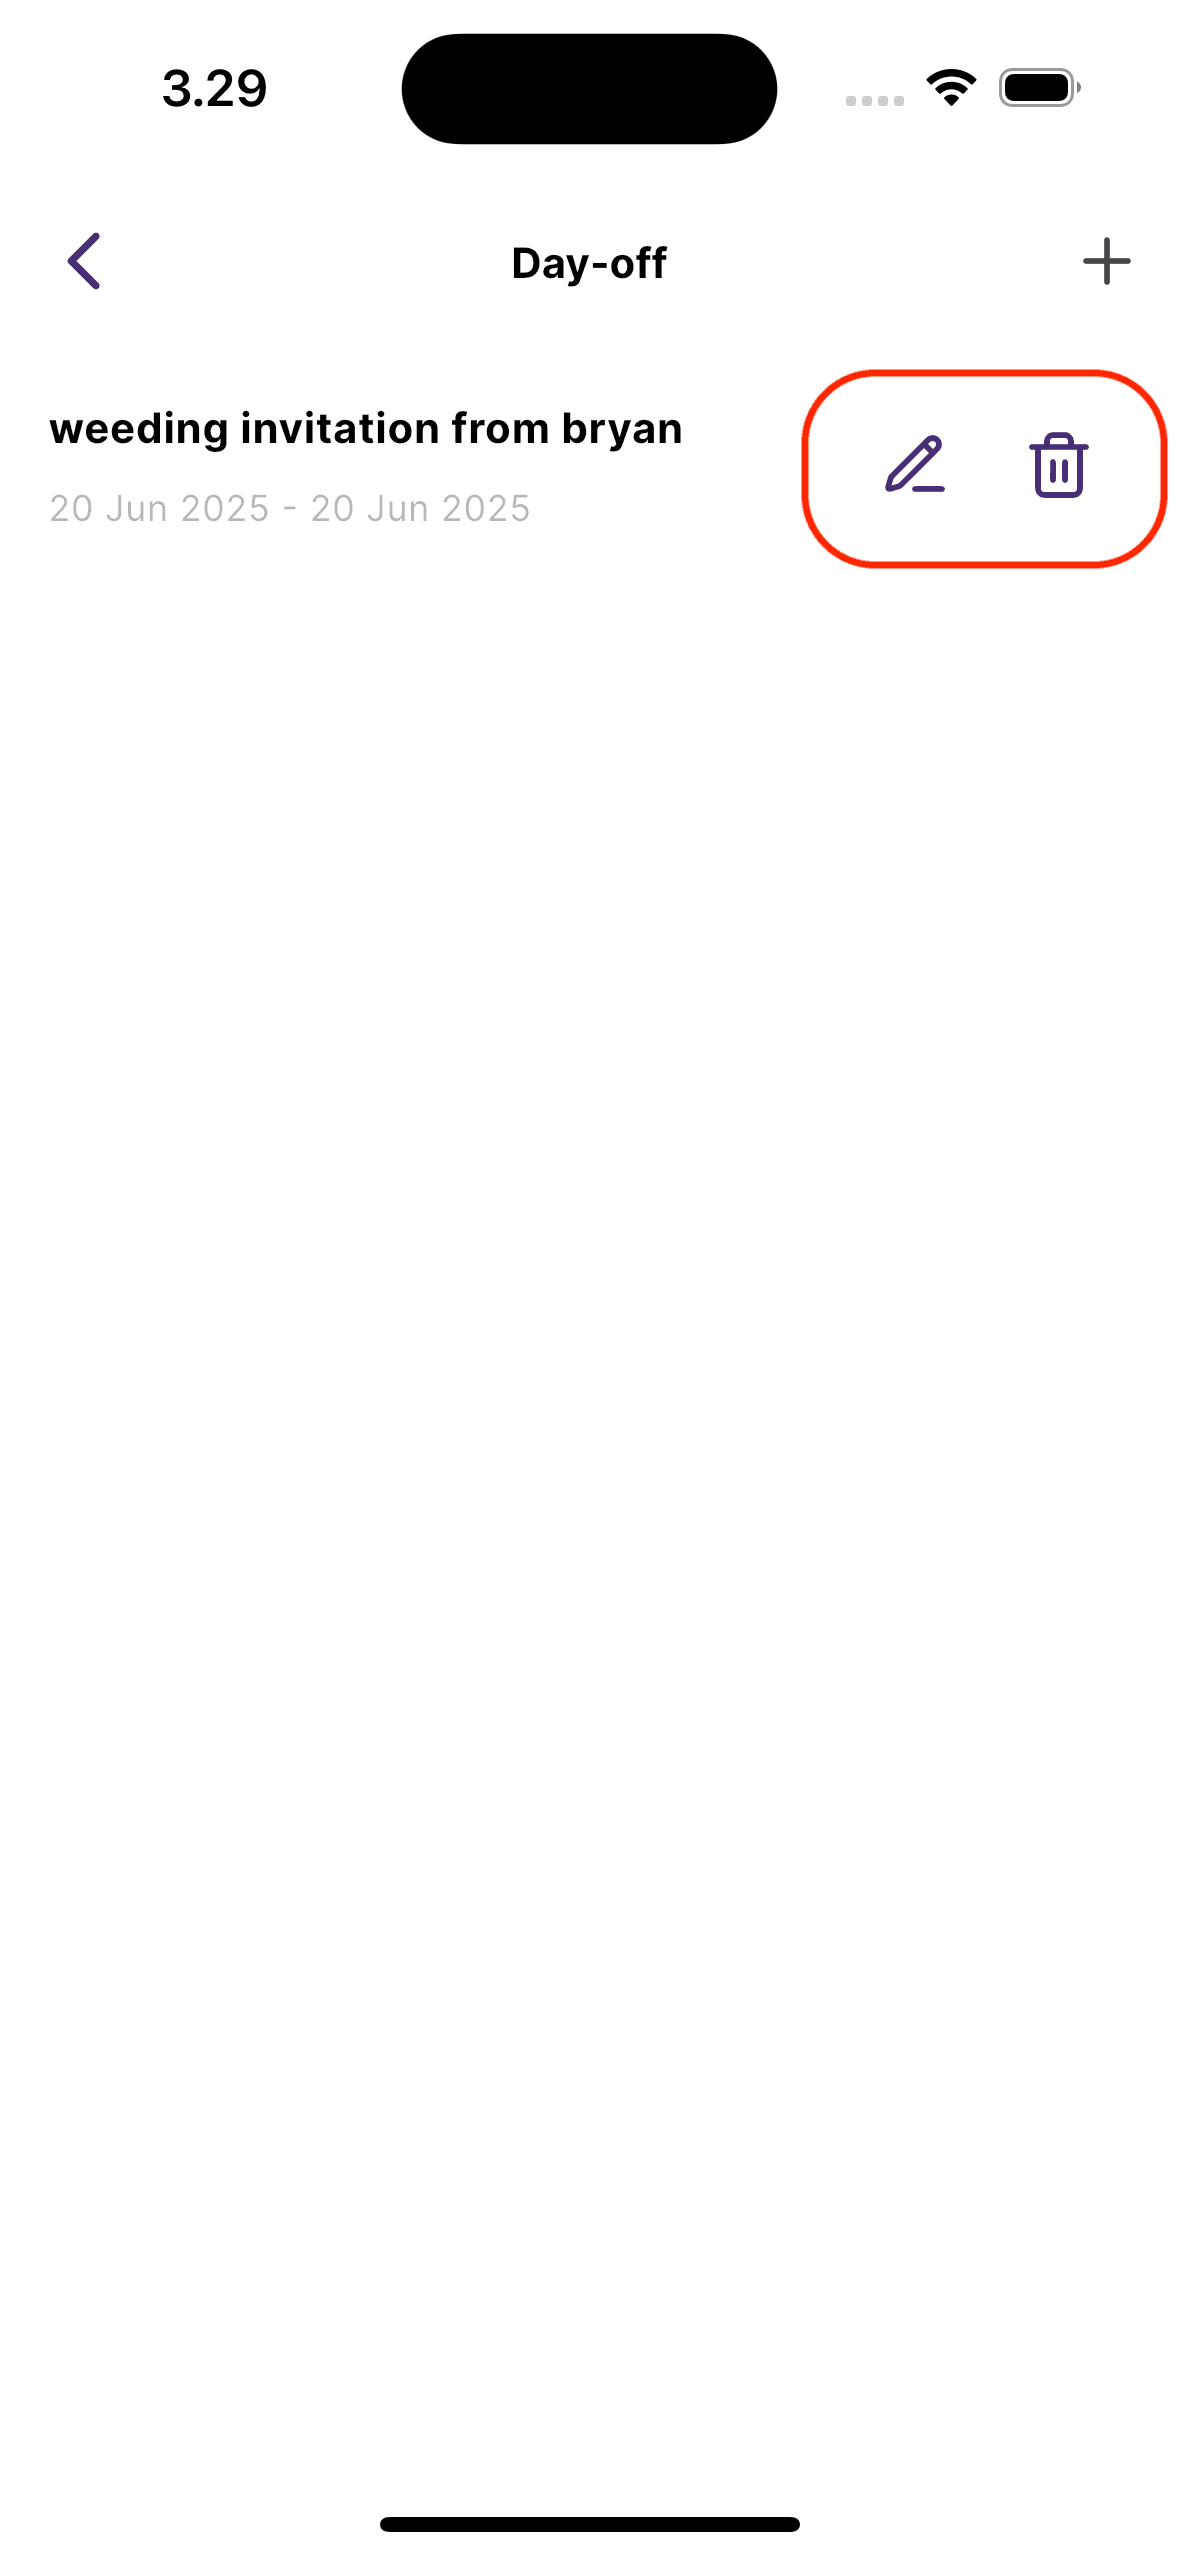
- Each entry includes the name, date range, and action buttons for edit or delete.
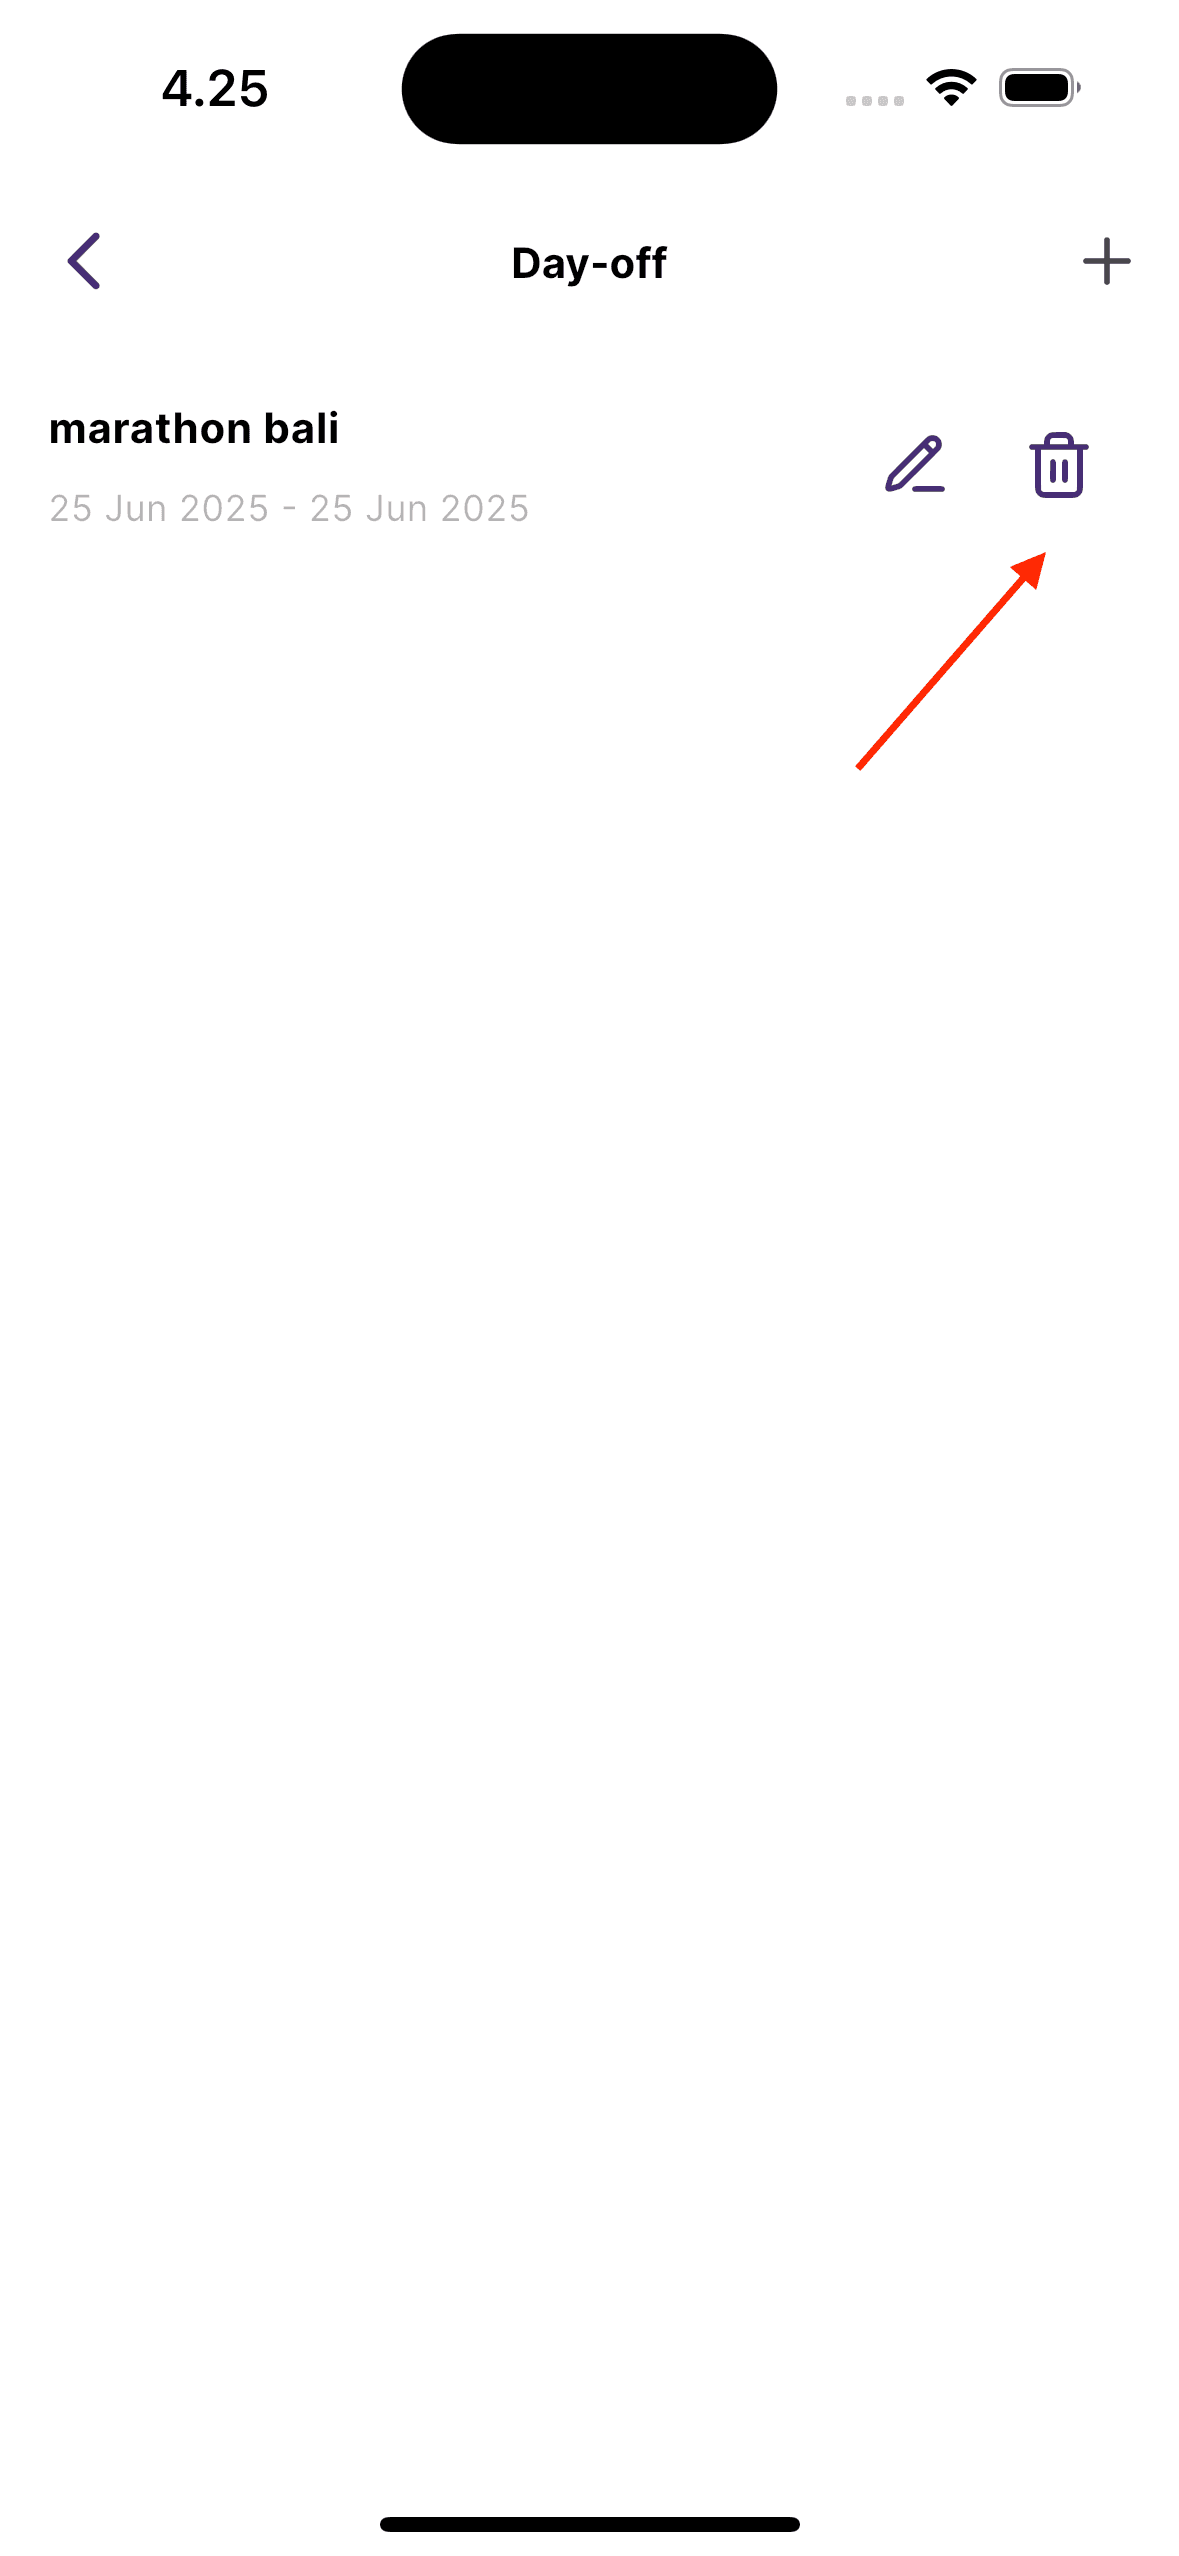
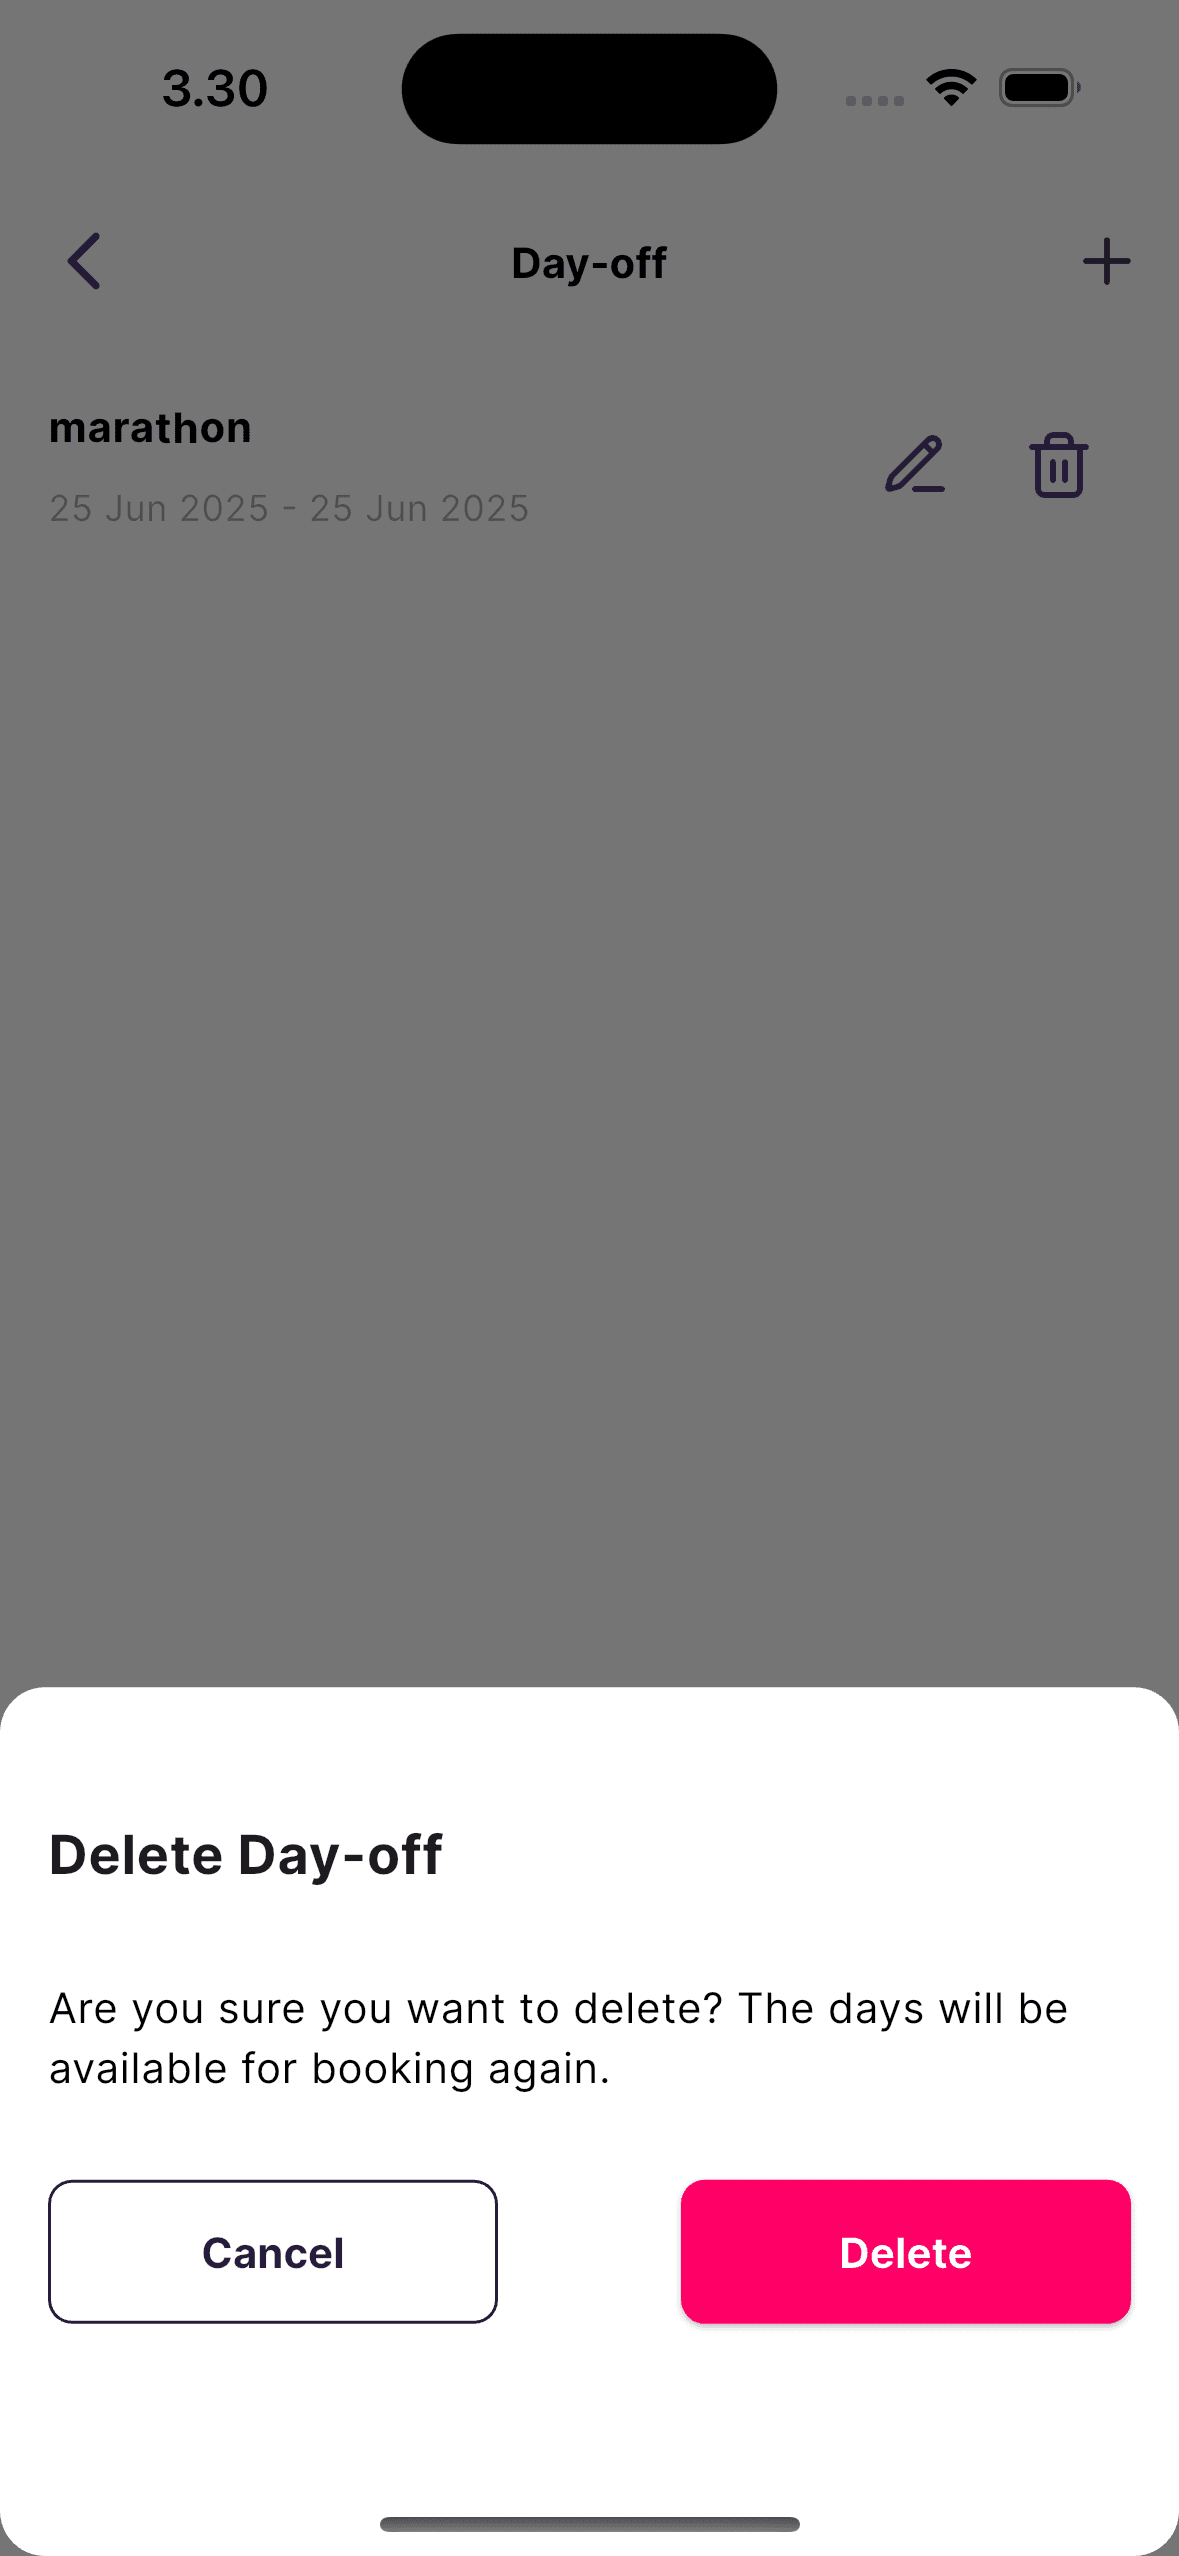
🗑️ Step 7: How to Delete an Off Day
- Find the off day entry you want to delete.
- Tap the trash can icon 🗑️ next to the entry.
- A confirmation dialog will appear—confirm it to permanently remove the off day.
✏️ Step 8: How to Edit an Existing Off Day
- Tap the pencil/edit icon ✏️ next to the off day you want to update.
- You’ll be taken to the Edit Day Off form, pre-filled with existing data.
- Make any changes needed—update the name, dates, or switch between one-day and multi-day.
- Tap Save to confirm the updates.
🔁 Summary
| Task | Action |
|---|
| Add Off Day | Calendar → + Button → Select "Day Off" → Fill Form → Save |
| Edit Off Day | Day Off List → ✏️ Icon → Update Info → Save |
| Delete Off Day | Day Off List → 🗑️ Icon → Confirm Delete |
